|
Custom Guitar Wiring!
WARNING: This pages has a lot of pictures.
For years I have been doing custom wiring on Telecasters and Stratocasters. My plan is to add a lot of wiring diagrams and other items of interest for customizing your guitar. Right now I would like to share with you few custom wiring jobs.
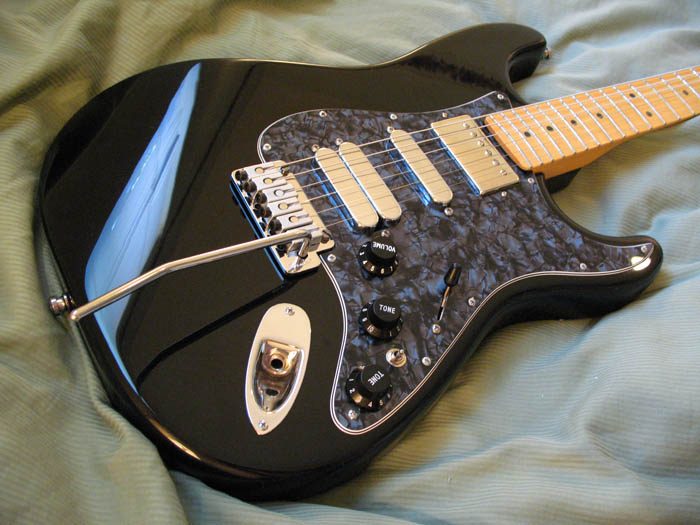
I want to build a twin sister to it but with a Rosewood fret board, standard bridge and a 2nd mini-toggle switch to split off one side (tap, as it is often called) of the humbucker. You can see some of the wiring of the (above) above guitar if you simply scroll down this page away. Now let's get on with mak'n her sista...
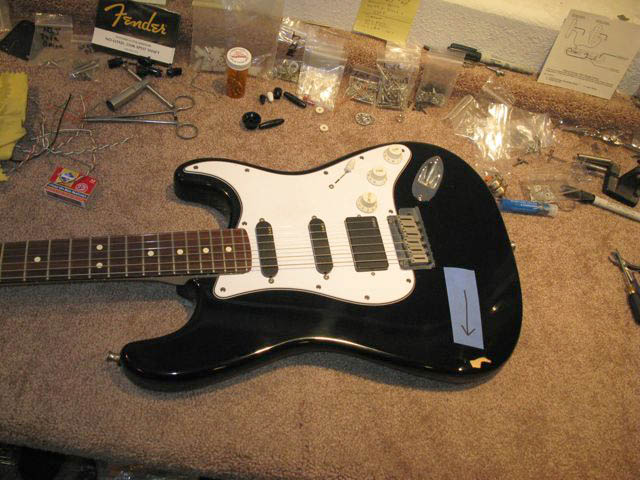 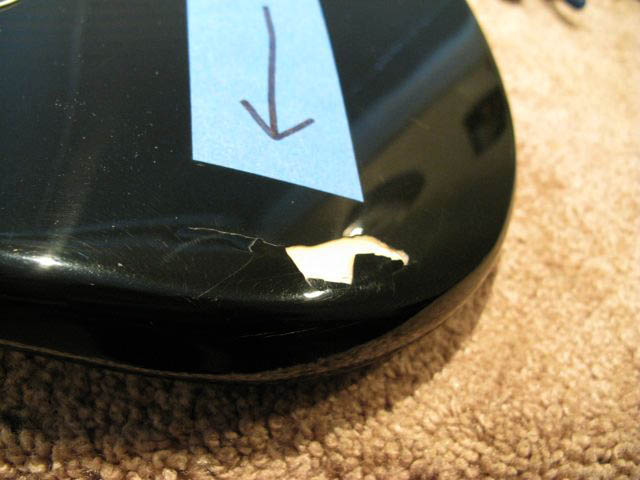 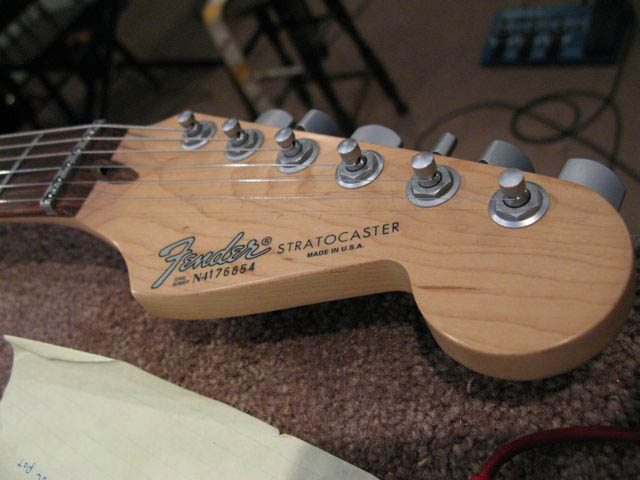
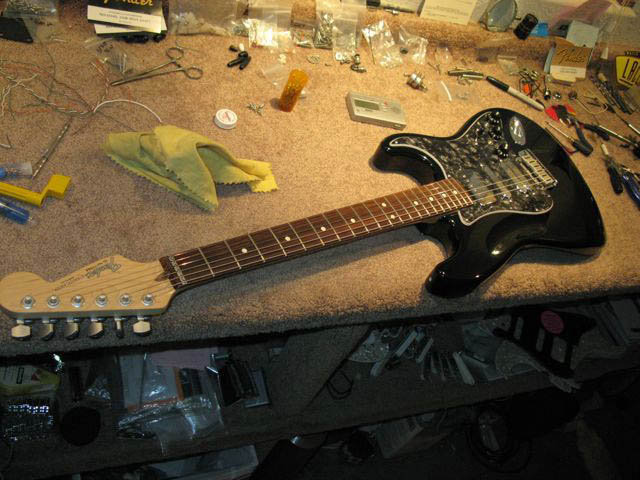
Ok, here is the candidate. This was a mint 1994 Strat Plus before UPS poked a hole thought the box damaging the body. As you can see, the owner installed an active set of EMG pickups (SA/SA/81).
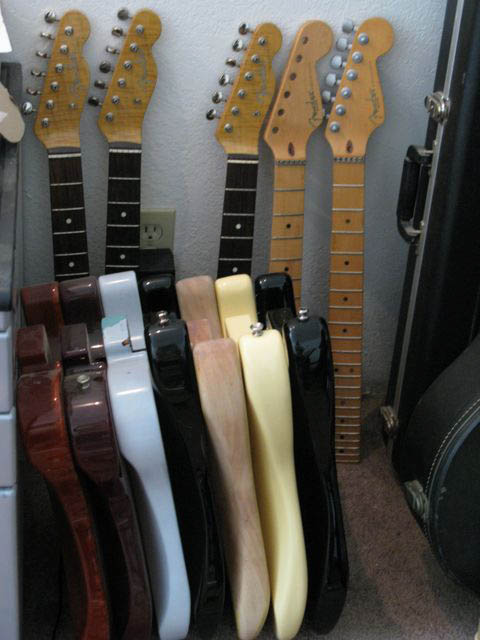 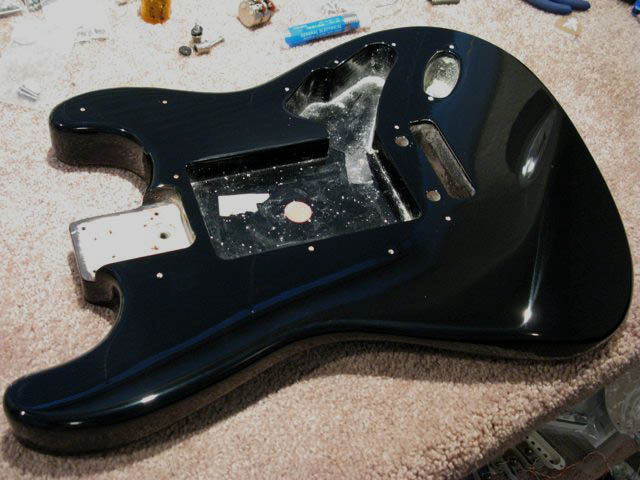
I happened to have a mint black 1995 Strat Plus body (within a month match of the neck!) in one of my piles of guitar bodies. I did some light wet sanding to remove some light pick scratches and then ran it over the buffer to a very high gloss.
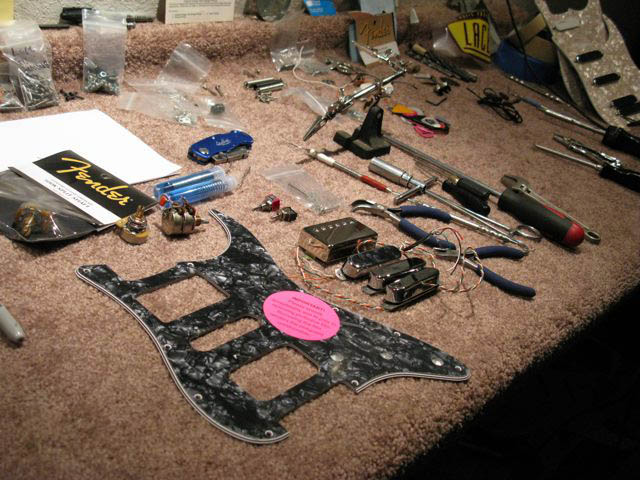 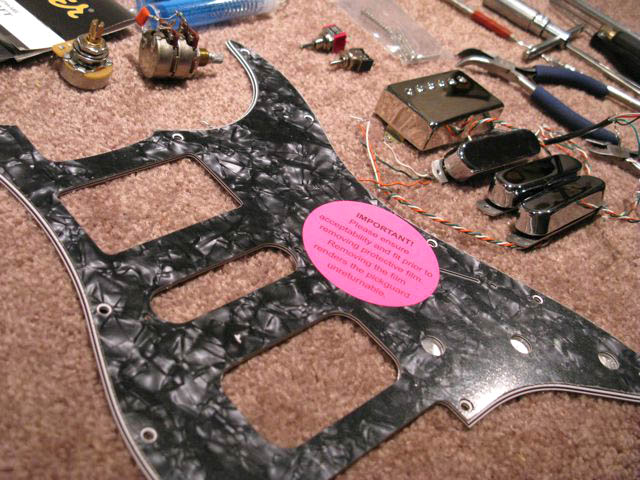
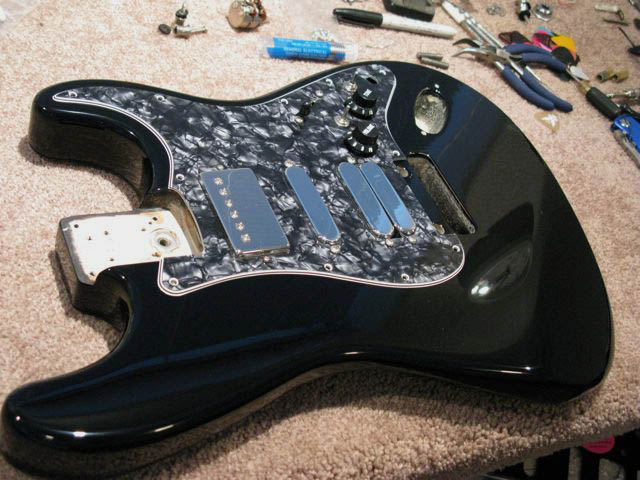
Next I will gather some of the items I will use in this custom build. This will use a Black Pearl Warmoth pickguard. Notice the hole cuts. Top has a square humbucker and the lower one is the rounded humbucker.
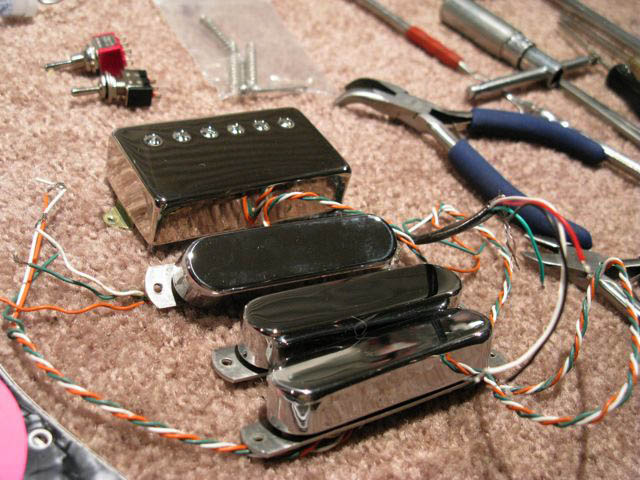 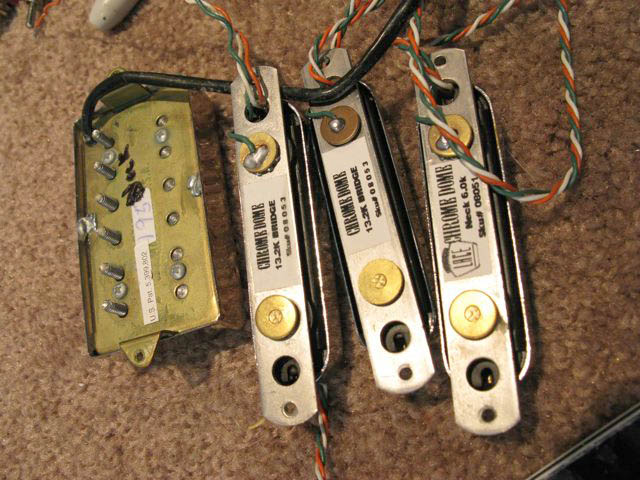
I will use a DiMarzio PAF (195N) in the neck, a Hot Gold Lace Dome in the middle and two Red Chrome Domes in the bridge. I plan on using the Fender Ultra (James Burton) Strat-o-Tele switching on this plus an extra Mini-toggle for splitting the humbucker. By the way, this particular build is really sweet because it gives you so many voices. You have the humbucker in the neck which can be split. So you have Gibsonish tone there. Then using the Chrome Domes you have the versility of many cool out-of-phase Strat quacks and honks. Using the Ultra Super Switching you also get Telecaster tones as well, and then can mix and match the voices. I must add esthetics is also taken into consideration!
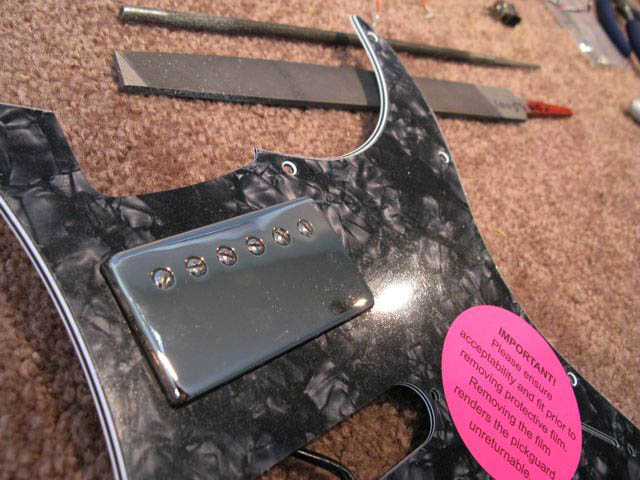 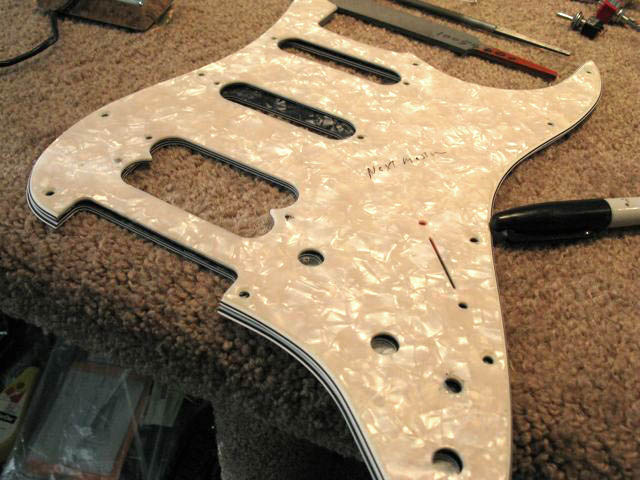
Ok. Let’s get on with wiring this. Next I am going to take round and square files and fit the upper humbucker hole to the pickup, as they will not fit right from Warmoth. I like to get it snug and then push it all the way down so I can mark the mounting holes with a sharp pick. Also we will drill all the holes on the pickgaurd. I will use a Fender Ultra pickgaurd as a template and line up the pot holes so I know where to drill the two mini-switch holes. A drill press is a great way to keep your holes clean and in place.
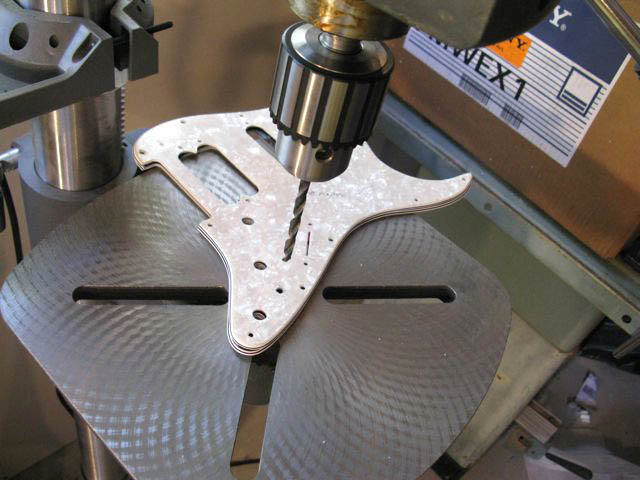 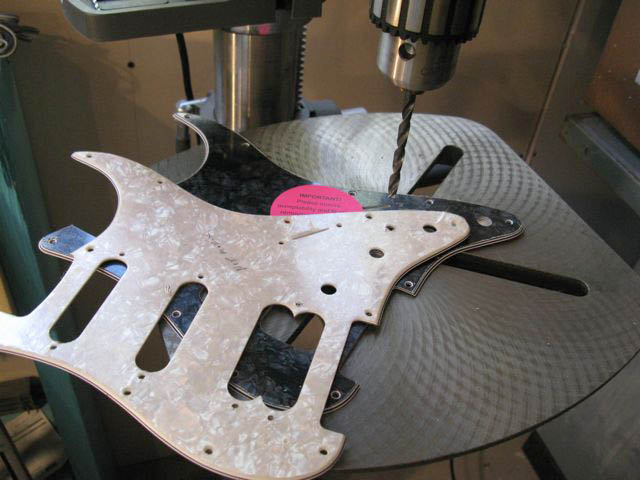 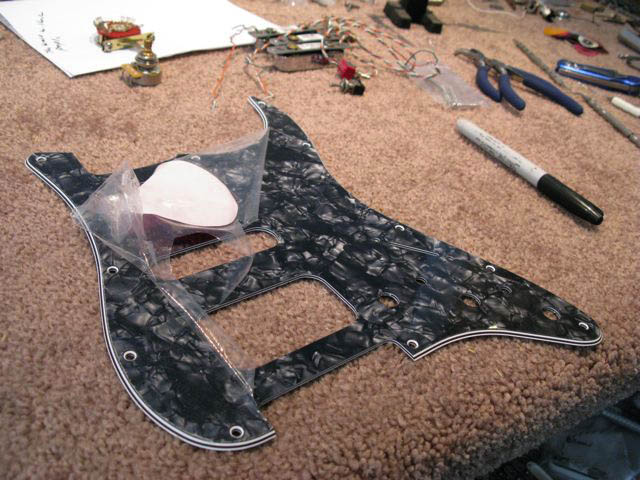 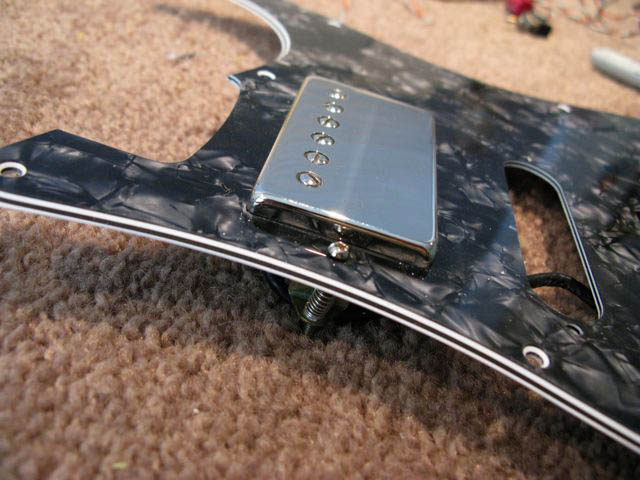 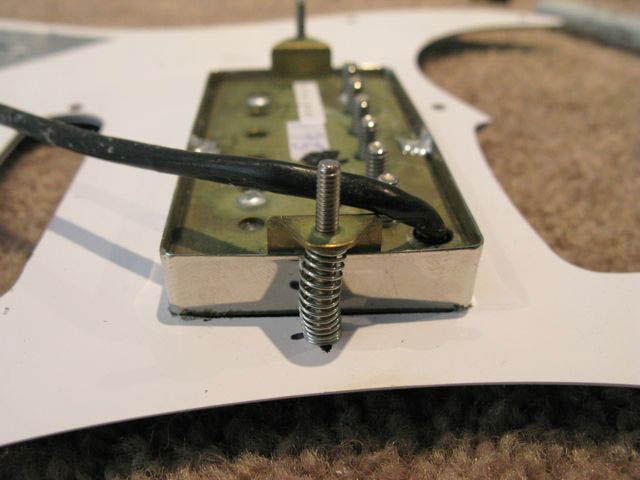
We can pull off the protective plastic and start mounting the pickups. The humbucker springs are a bit of a pain sometimes and you have to clip the srews off as they are too long and will hit the bottom of the Strat body in the route. The Lace Chrome Domes are connected by a small bracket that makes the two pickups mount like a humbucker. Fender used this same bracket on all their Ultra guitars. Lace is now gluing the two pickups onto one mounting plate with small holes like on a standard humbucker. I really prefer this way as it mounts the pickups very solidly on the guard (Scratch Plate for you Ozzies, Kiwis and UK folks!)
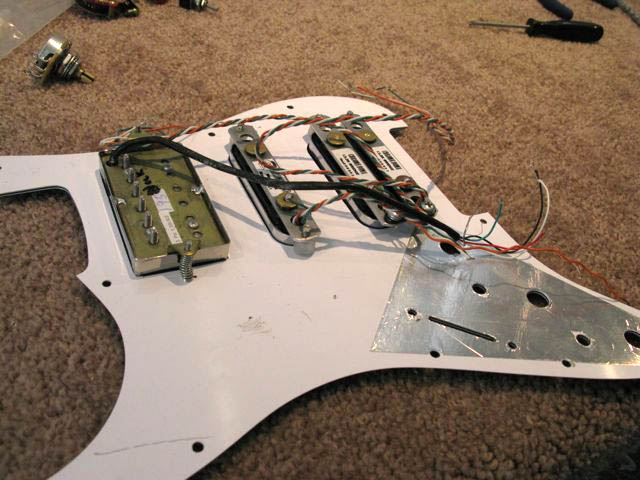 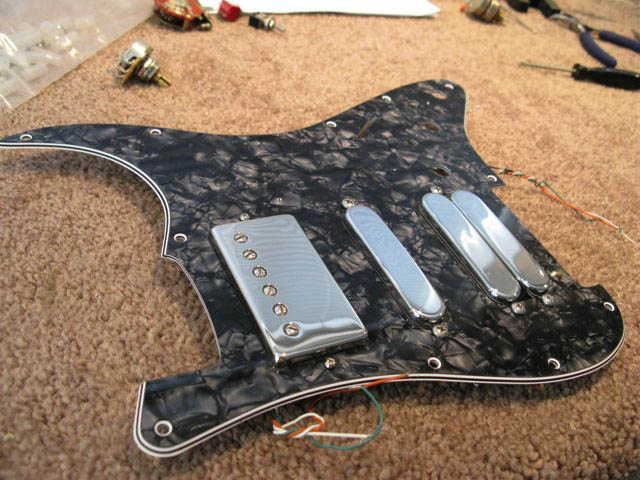
Ok here is the pickguard with all the pickups mounted. It already looks cool. The Laces use the small rubber surgical tubing instead of springs for mounting. I like to put the screws through the guard and then cut the tubing the same length as the threads poking through. This makes the pickup stay firmly in place and will not be rocking in the guard (no pun intended!)

I would like to share with you what is happening with the Lace Dually in the bridge using the on/on/on mini-switch. When the switch is up, the upper Lace is on. When the switch is in the middle position, both Laces in the Dually are in SERIES. When the switch is down, it activates the lower Lace. Here is a diagram of what how it is wired (Above).
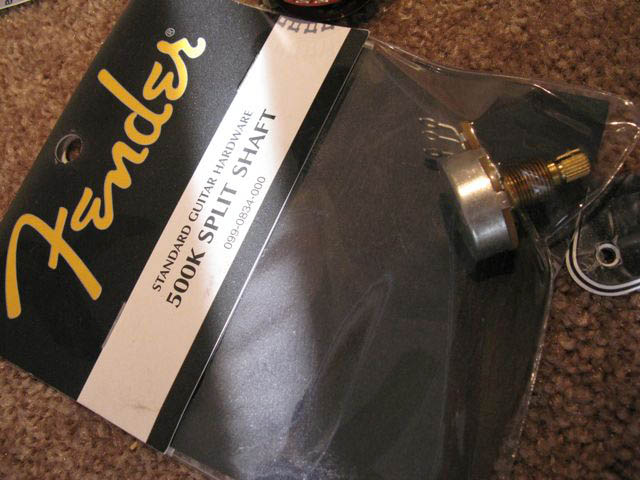 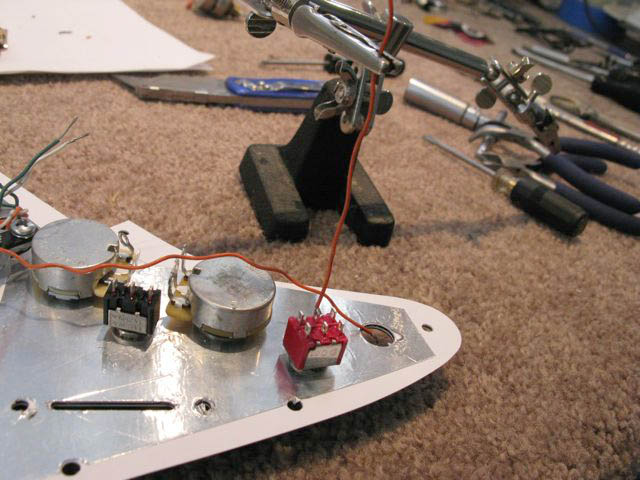
I would like to show you how to solder these up. I am going to use a 500k linear taper pot for the humbucker (first tone control). I like using the 250k audio taper pots for the volume control. This will also have the TBX tone control in the lower position. I mounted the volume and 1st tone control, plus the on/off mini-switch for splitting the humbucker and the on/on/on mini-switch for the Lace Dually. The alligator clamp holder really is handy for soldering. Her it a few soldering tips:
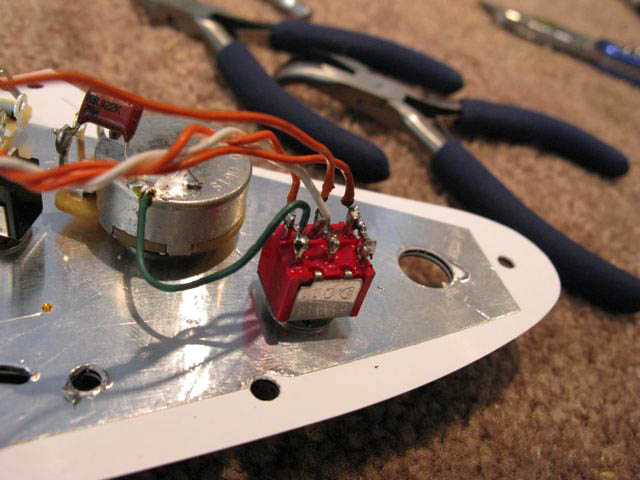 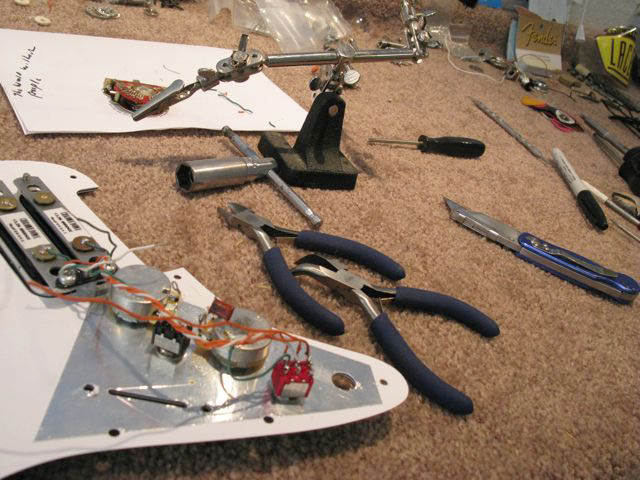
Have a soldering iron that gets really hot really fast will make the job go a lot smoother. Mine has two settings, 100/140 watts. I use two sizes of rosin core solder that is designed for soldering wire: One is bigger at .062 with 40% tin / 60% lead. This is really good for soldering wires down on the back of a pot or filling the bigger holes when soldering the wires onto the pot connectors. Its higher lead content makes it melt faster and stick better in these applications.
The other solder has a smaller diameter at .050 with 60% tin / 40% lead. This works great for soldering the wires on the small areas, like the 5-way switch and the mini-switch lugs. Also NEVER cut a wire unless you are absolutely sure it should be cut! Save all cut off wire and use it for wiring the other parts of the assembly. Measure your wires so when you cut them they are the same length if going to the same place. This keeps the job clean. I also like to braid my wires to keep it looking tidy.
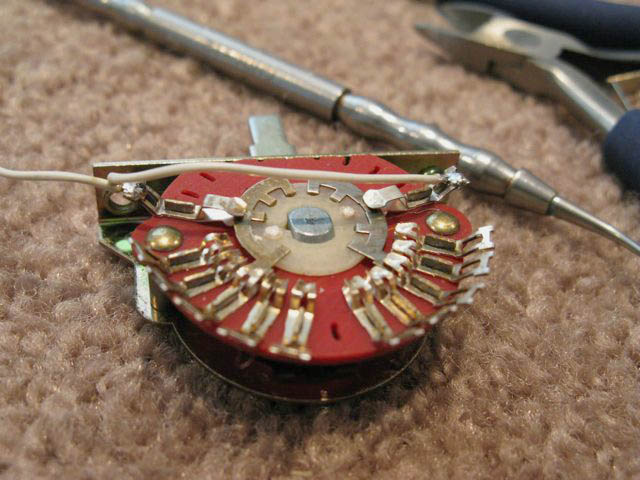 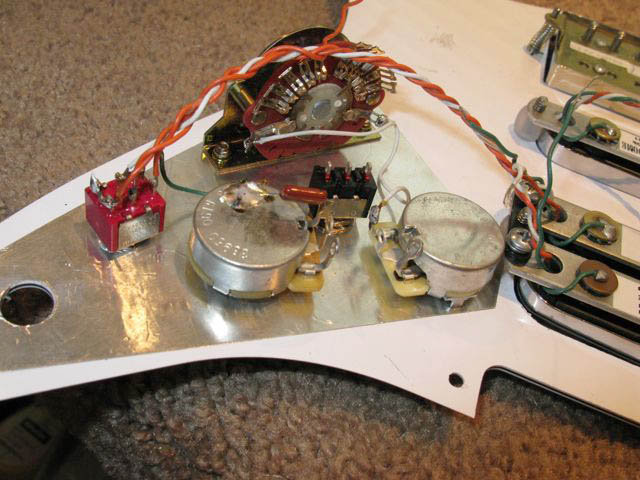
The Ultra/ James Burton Strat-o-Tele wiring uses a 5-way, single wafer, 2-lug Super Switch. These were out of stock at all wholesale vendors here in the US for nearly a year up until a few weeks ago. The last batch I bought I got from the UK. This switch gives you the bridge & neck pickups in position #3—instead of the typical middle pickup on a standard Strat.
Now notice something. I solder a white wire from the left lug to the right lug and a wire from the left lug that is free about 3 inches long, that will be trimmer and then soldered on the right lug of the volume control. Fender connects the TBX tone control on the right lug, which is crazy as the TBX then affects all the pickups. I choose to connect the TBX to the bridge and middle pickups, which I will show you in a bit.
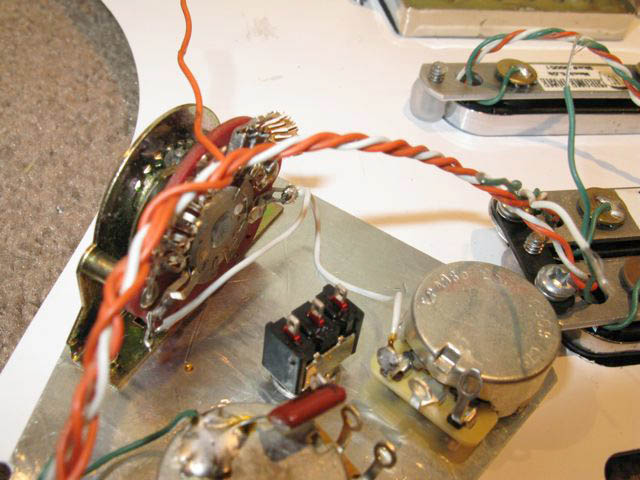 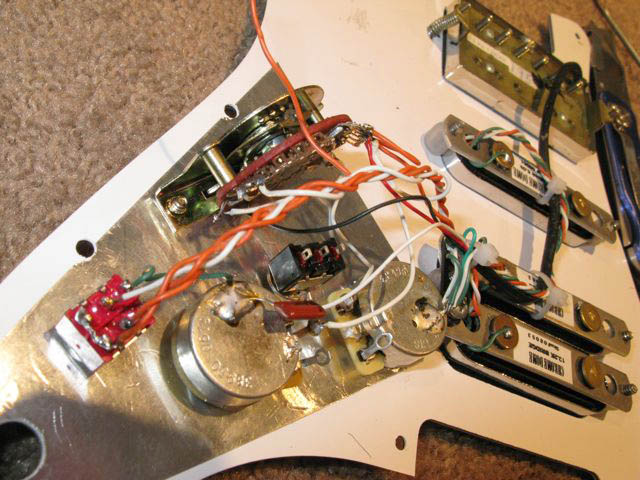
Please note I have also attached the small nylon ties to hold the wires in place. While soldering I use a surgical hemostat to hold the unwanted wires out of the way. All the ground wires are trimmed to the exact same length and then trim back the coating about .5 inch so it will be easy to solder them all together for a ground.
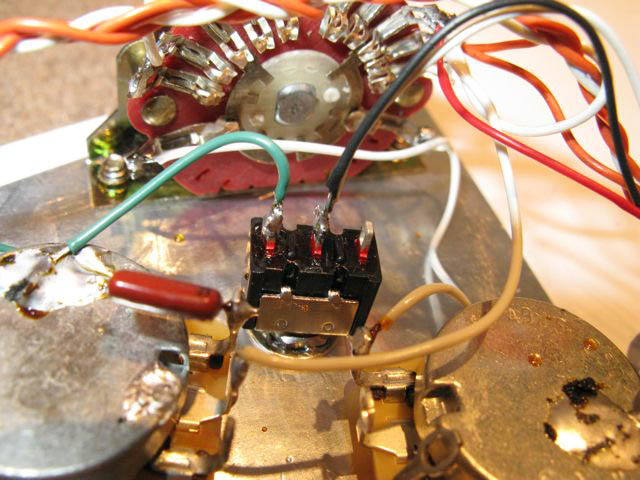 
Next I will wire up the “coil tap” for the humbucker. This allows you to flip the switch up and it will cut off one side of the windings on the humbucker, giving you more of a single coil sound. It simply grounds one side of the pickup windings. It is nice for mixing with the middle pickup for those Strat tones. DiMarzio has the Red=Hot, Black and White=Tap, and Green ground. Seymour Duncan has a different color scheme.
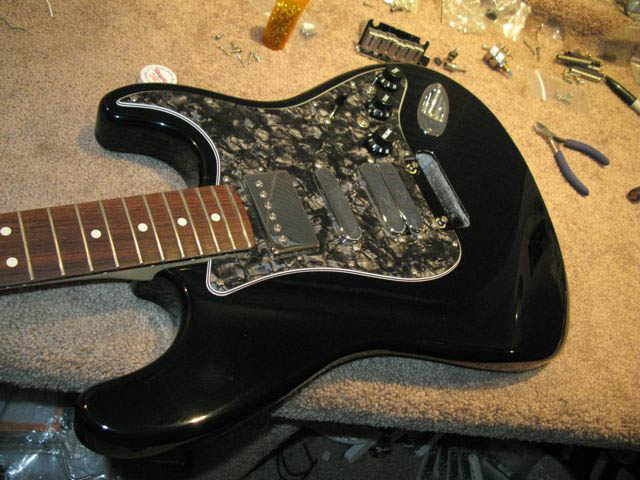
Ok. So lets take a sneak peek at what the setup looks like on the body. Notice there is no TBX tone control mounted yet.
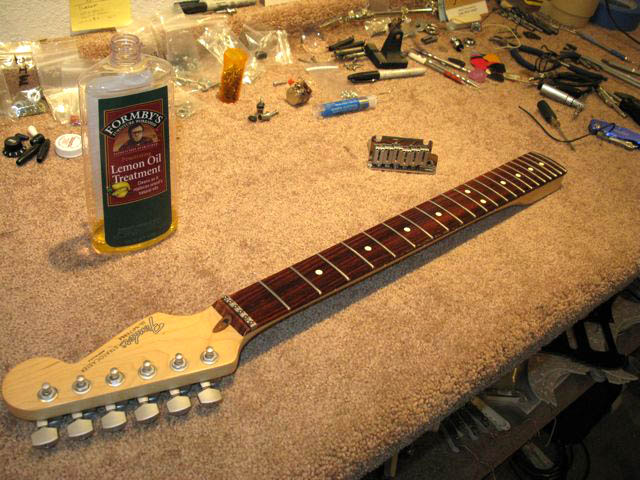 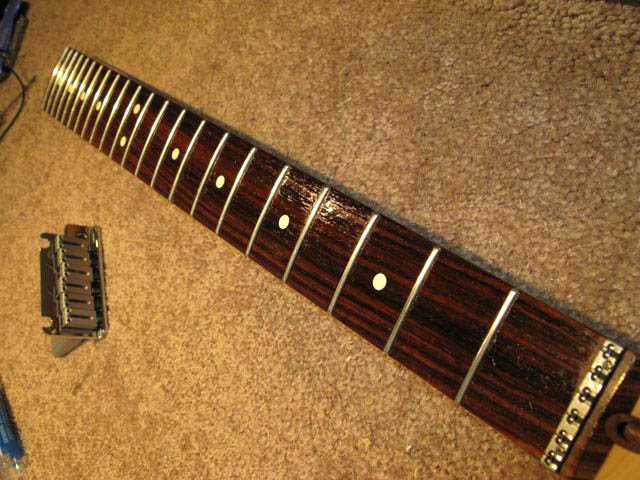 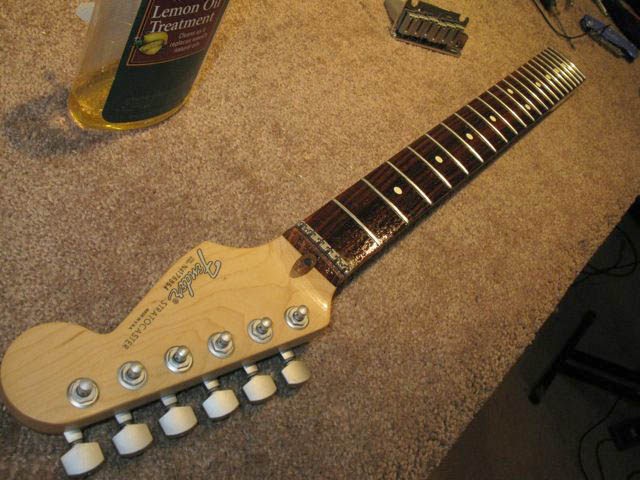 
The next thing I did was polish the frets. Since this neck is nearly mint, I used a flat board with 2000-grit paper and gave the frets a good shining up. Next, I took the neck to the house and used a tooth brush with mild soap and a very small amount of warm water and scrubbed every millimeter of the neck. This works loose any grime on the fret board, around and on the tuners, etc. DO NOT GET A DROP OF WATER INSIDE THE TRUSS ROD HOLE! I do a quick warm water rinse and then vigorously dry with a soft terry cloth towel and compressed air. I also did the same thing to the bridge so it looks like new.
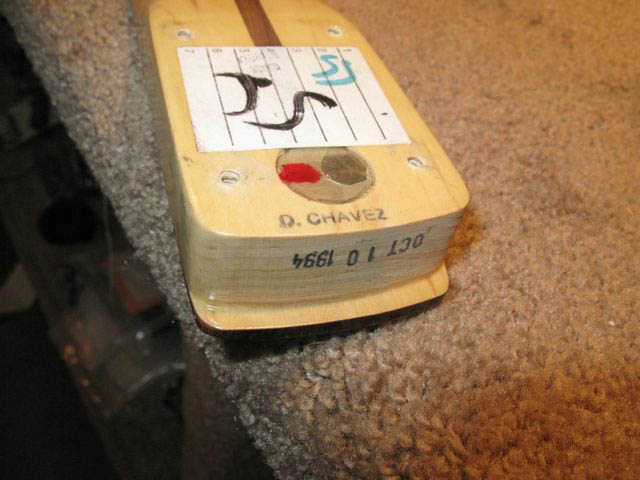
Back in the shop I add a generous portion of Formbys Wood Oil on the rosewood with a small cloth. Washing with a brush and mild soap opens the Rosewood grain. The oil now can soak into the wood better. I work the oil into the wood with my fingers and then let it set for about one hour and then using a clean paper towel, I wipe up any excess that has not soaked in. This neck was made in late Oct 1994 by D. Chavez. I have heard he later worked for Fender’s Custom Shop.
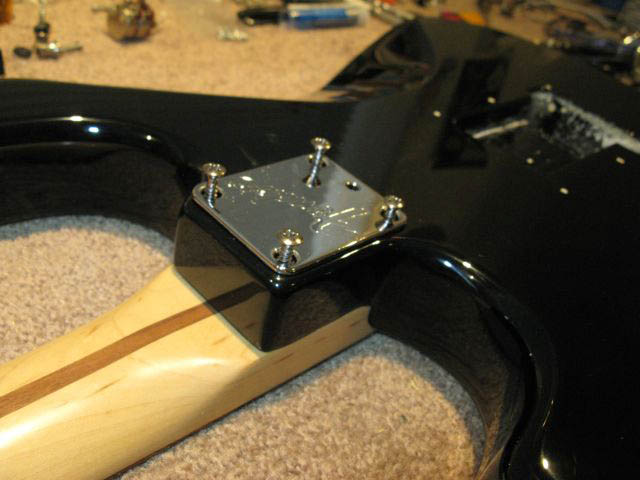 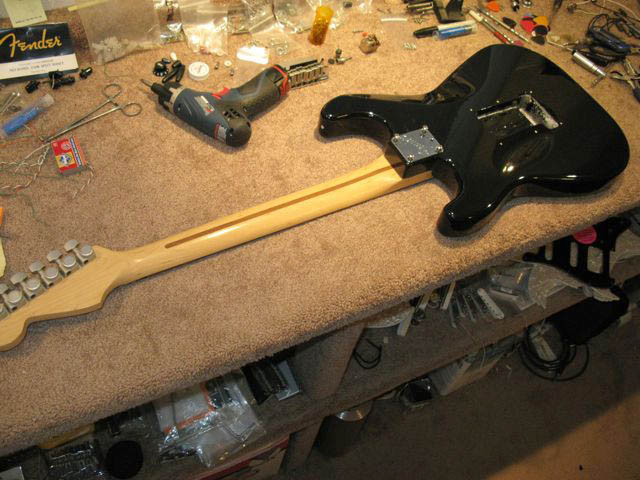 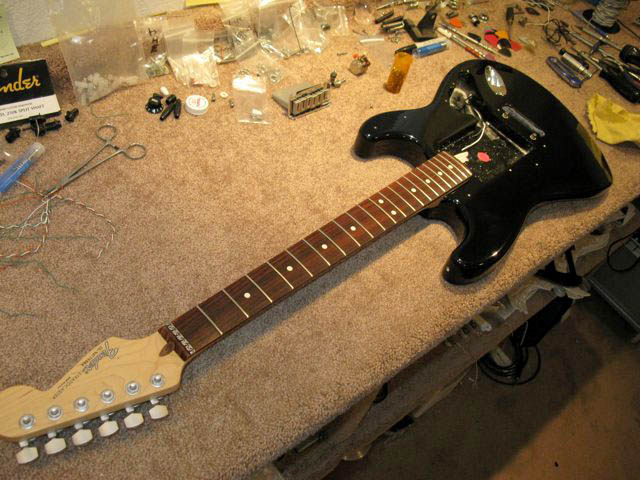
The neck needs to be mounted straight. After you string it up, you might have to slightly adjust the neck left or right a small amount to have the strings track the neck perfectly straight. The neck is now on the body ready for the next step. We are getting closer now!
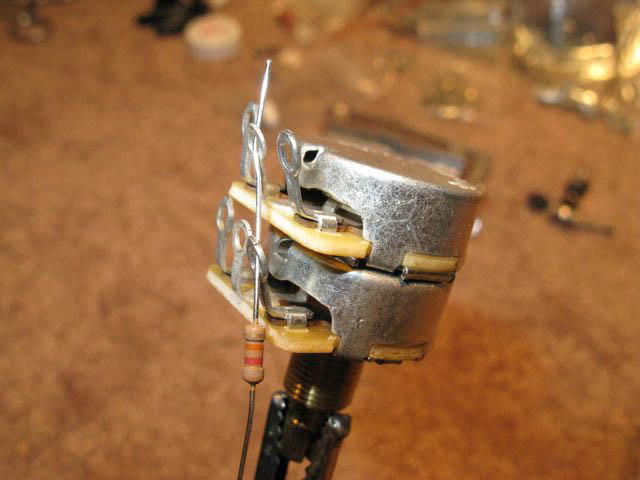 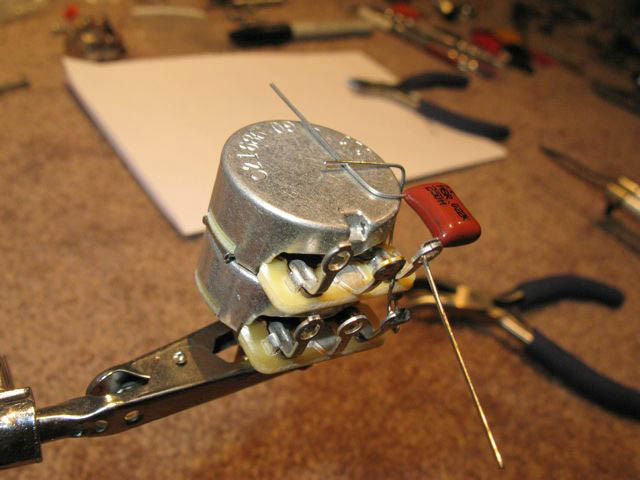 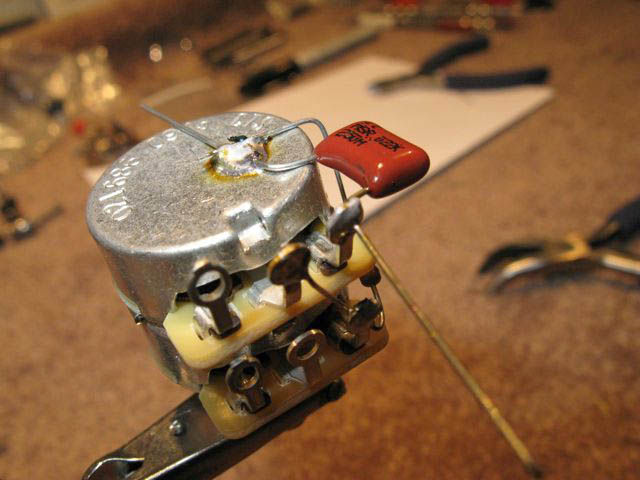 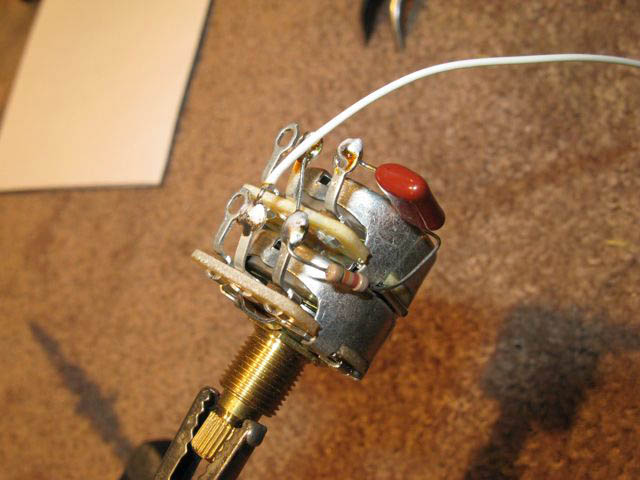
Now let’s get that TBX wired up and installed. A TBX is a stack set of pots (potentiometers to be exact). It is a passive, split-shaft, 250k/1 Meg tone control which extends the treble and bass frequencies when it is turned either way past "5". The detent is “5” which is considered to be “tone neutral.”
I like to slightly bend out the lower left lug and the upper middle lug to make it easy to slide the end of the resistor through to be soldered. Trim after you solder, and bend the other end around and up to the top. Push the capacitor through the upper left lug and pin it under the resistor wire. Now you can solder it easy and trim the excess. Add a white wire to the lower middle lug and it is ready to install on the pickguard.
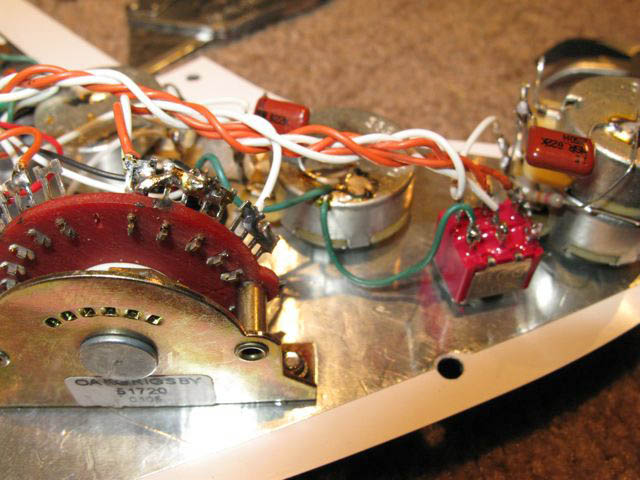 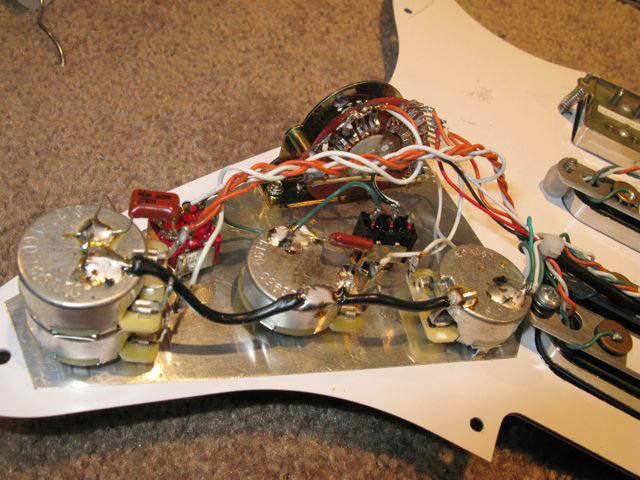 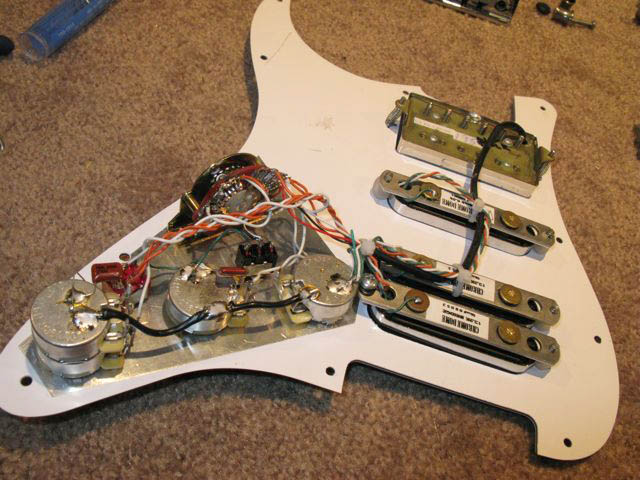 
Once on the guard the wire from the TBX is twisted together with the wire from the mini-switch and soldered to the first 3 lugs of the 2nd half of the super switch. Black ground wires are added to connect each pot and the right lug on the volume control. I do not have a presentable wiring diagram for the 5-way switch, or I would post it. Mine is hand written chick’en scratches that would be pretty confusing to you. The pickguard is now ready to install. Now I will solder the input jack wires on to the setup, a ground wire t the body cavity and the tremolo, and screw down the pickguard onto the body. Next we will install the tremolo, trim setter and get the guitar set up!
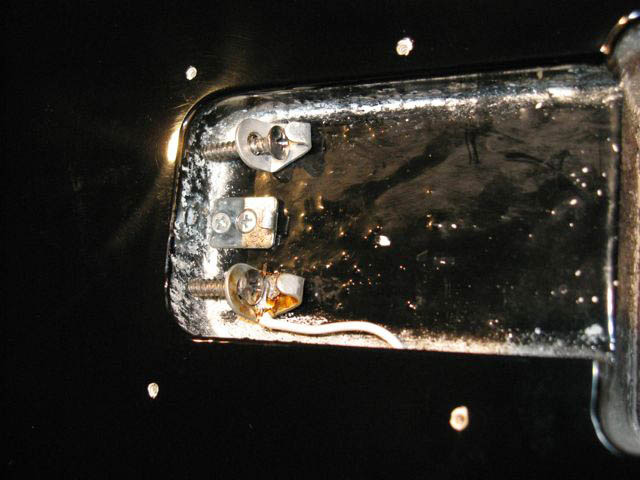 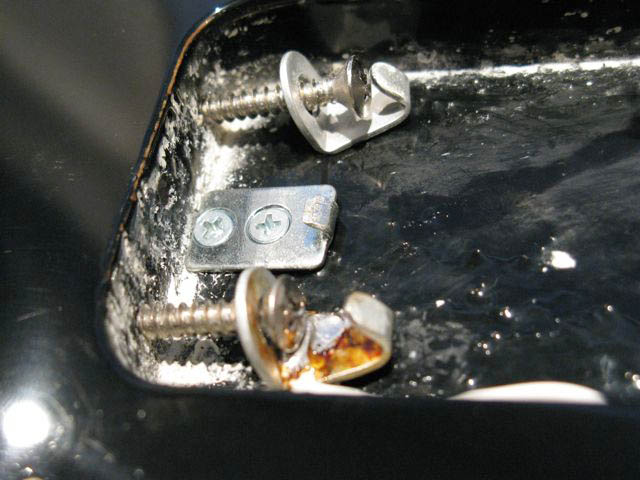 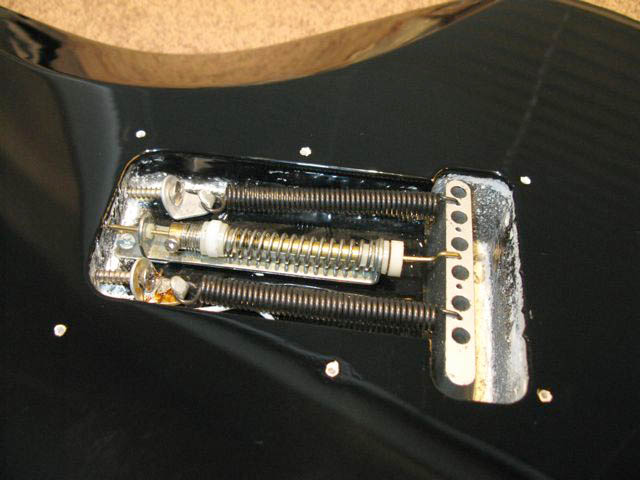
Ok, let’s try to get this finished up. Next the bridge and the tremsetter needs to be installed. Screw in the two spring claws and mount the tremsetter mounting plate. If you looks closely you will see a small hole in the back side of the Tremolo cavity for the tremsetter wire to poke into. Some people, who have a standard spring system see this hole and wonder, Umm, what’s up with that!
 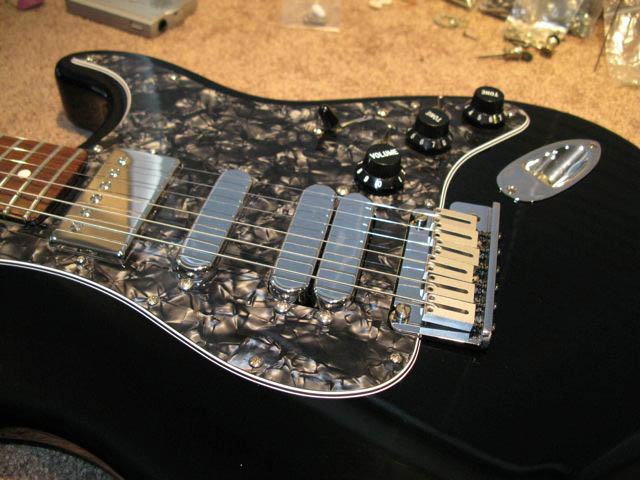 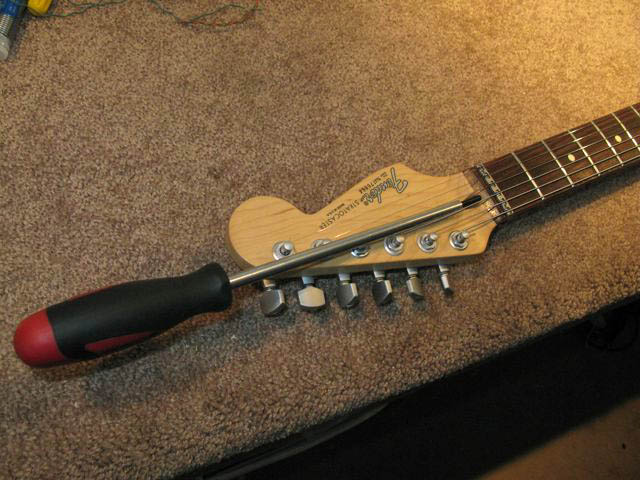
Set the bridge in place, connect the two springs and then carefully string the guitar. Make sure the tremolo block is seated properly on the 2 trem posts. Tune the guitar and then play with the spring tightness—tuning and adjusting the springs till you have about ¼ inch gap between the top of body and the bottom back of the bridge. Pop the tremsetter in. Setting up a Tremsetter is a little tricky and there is a good YouTube video that shows you how to do it step by step. NOW, let the guitar settle I for at least 24 hours before doing any more adjustments.
After settling in, the next step is to adjust the truss rod. Having the right tool make this much easier. I have .10s on this Strat so I set the gap between the string and the 8th fret at about .09, while pressing down on the 1st and 22nd fret at the same time. Adjust the intonation and string heights. I did not have to raise the heel f the neck with the micro-tilt adjustment.
OK: Here is the finished product! And by the way, this guitar plays really sweet. it was one of those cases where it fell into a very nice setup without a lot of adjustments. Sometimes that just happens!
 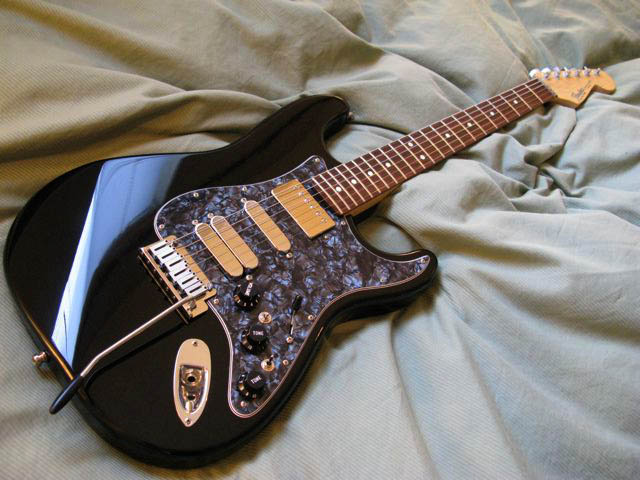 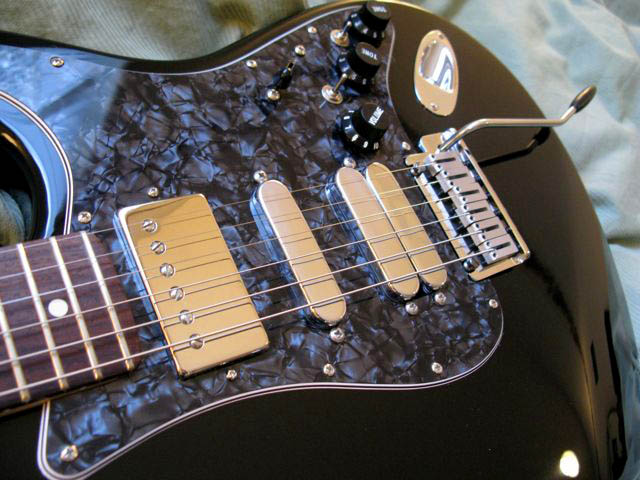 
SO Here are De Sistas
 
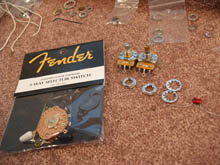 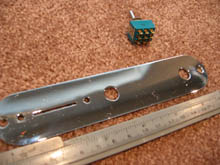 
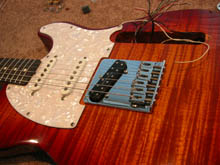
The first thing I do is gather all my parts. In this case I already put the pickups in the guitar, so I can't show you that part of this install. In this Tele I chose 2 Dimarzio Strat pickups for the neck (HS-3) and middle (HS-2) positions and then a Seymour Duncan Little 59 Humbucker in the bridge. The DiMarzio pickups are stacked humbuckers. So this means all three of these pickups can be split, or tapped, as some people call it. These means you can cut off 1/2 of the windings and lower the "k" resistance of the pickup output, thus creating a less hot response.This is nice for a more vintage sound, while at the toss of a switch you can get a hotter, fatter, humbucker tone. In this case all 3 pickups at the same time. I will be using a standard 3-way switch for this setup. Note that the tone control is Fender's No-Load control. This means when you open it all the way, it will have a light click feeling, and then the tone control is completely bypassed altogether, thus giving no resistance to the pickups.
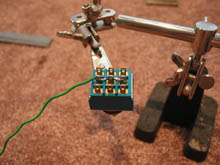 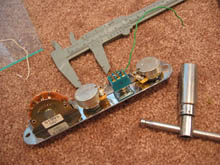 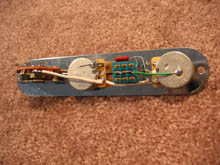 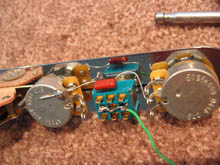
Soldering all this to make it fit is quite a chore. In this case I am using a on/off mini switch that has sets of 3-lugs. This allows me to ground 1/2 the windings of all 3 pickups at the same time, without them interfering with each other. As you can see, this is really a tight fit!
 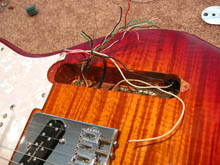 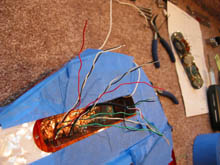
Next I will prepare the guitar so the top does not get scratched or hot solder falls onto and burns the finish. One has to also sort out all the wires and know that different pickups use different color schemes. DiMarzios use one color scheme and Seymour Duncan another. I will have the charts for those on here soon.
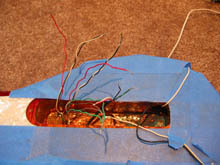 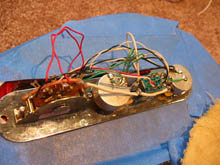 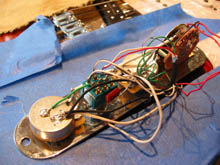 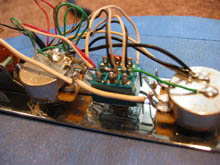
Using blue masking tape works well to protect your work area and pulls off easy without damaging the finish. Solding in these tight areas is tricky. You need to have a soldering iron that gets hot fast. Unless you have some experience, i would not recommend trying this as your first project!
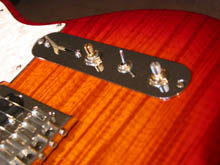 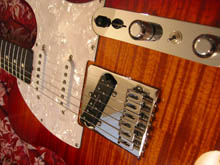 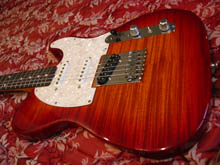
The next step is closing up the guitar, making sure no wires touch inside, such as on the switch or other areas. Then bench testing the electronics is the next step. When removing and installing screws, it is good to use extra care and a driver that fits the heads of the screws perfectly so you do not slip and scratch the finish. So leaving the tape on is a good idea untll your done. I just pull it back enough to allow me to tighten everything down. Protecting the finish is a must.
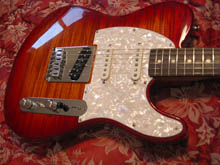 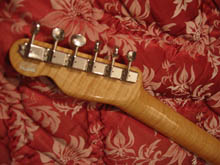 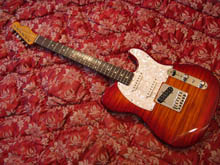
Above you can see the finished project. These guitars have the feel of a 1962 Reissue, but with this special configuration—pickups and wiring, the guitar voices everything from a Tele to a Strat to fat humbucker tones! Check out the DX Tele Custom page for more of these creations!
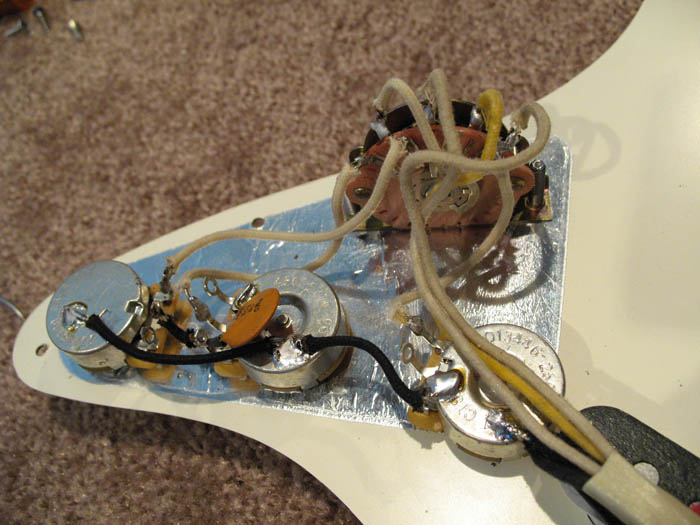 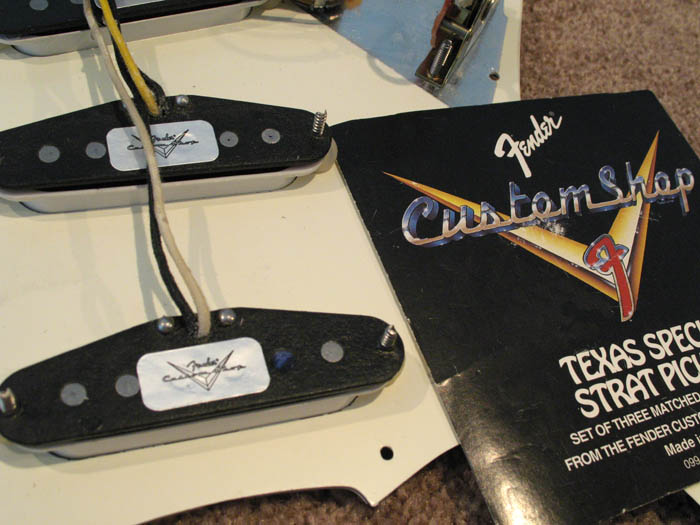  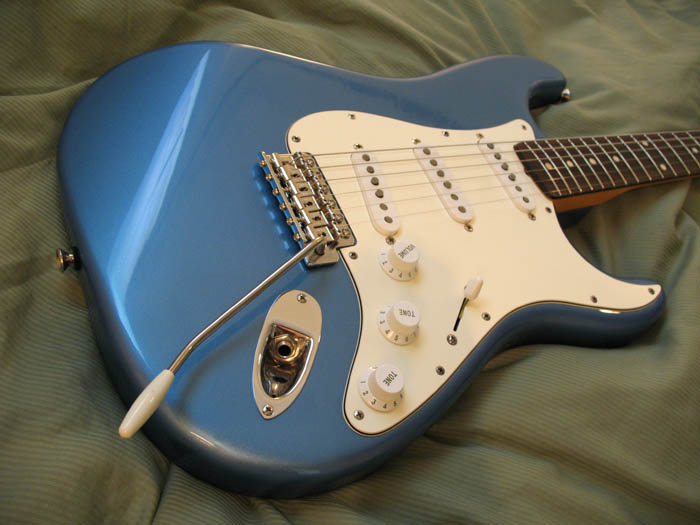
This was another recent project: a Fender CIJ 2005 LAKE PLACID BLUE 1962 STRATOCASTER REISSUE that has been completely rewired using all new USA parts and Fender Custom Shop pickups. Since this is a 1962 Reissue, all the wiring has been re-done with vintage cloth wire. It has an old ceramic style capacitor on both tone controls. The second tone control is a Fender No-Load tone control. Turn it to 10 and you bypass the tone control completely, thus giving you the middle pickup with no resistance.
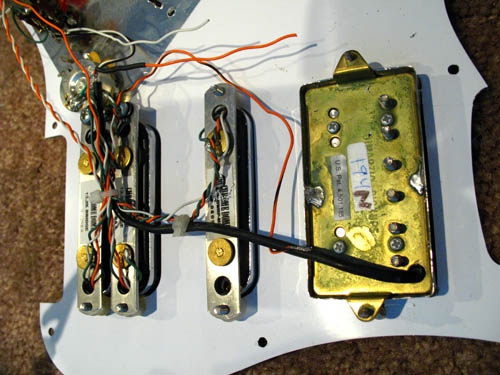 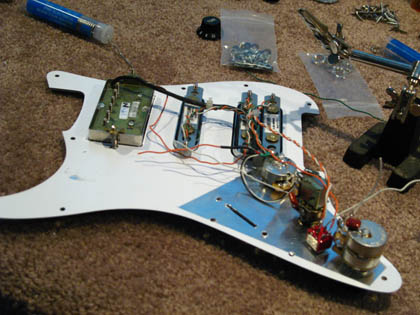 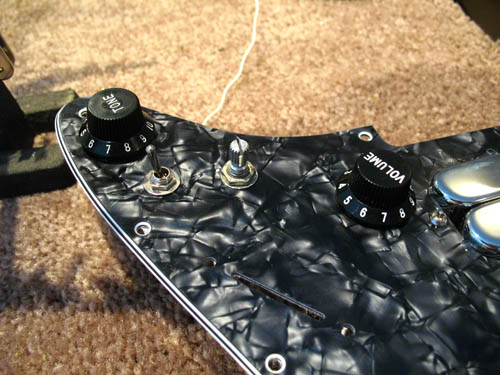
This is the the start of a dream guitar I have wanted to build for a long time. When I did the custom build with 2 humbuckers and a single Chrome Dome in the middle, I lost a lot of the Strat quack and honk in switch positions #2 and #4, even using a tap switch to split the humbuckers into a single coil phase. With this wiring it was something totally new! Using a DiMarzio PAF Classic Humbucker (DP194N) in the neck position, I could get all those great Les Paul/PRS sounds, yet the rest of the guitar was wired like a Fender Strat Ultra. Examples of these can be seen on my Customized Strat Plus page. I go into great detail on that page explaining the Ultra wiring. Soldering up a guitar like this takes some time and patience. Pickup polarity is another thing you have to watch for too. Parts used on this are: 1 500K push/pull pot; TBX Tone Control; 3-way mini-switch (on/on/on); Audio taper pot, and a 5-way single wafer super switch. And then, of course, the pickups!
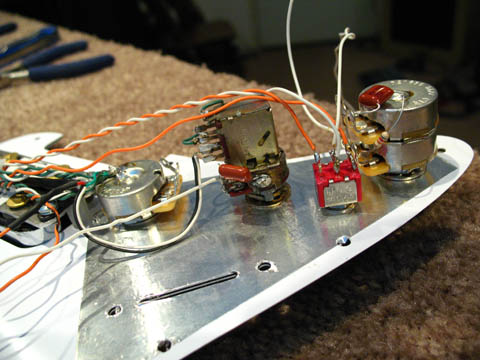 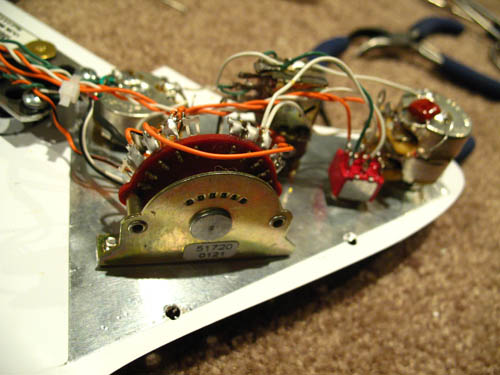 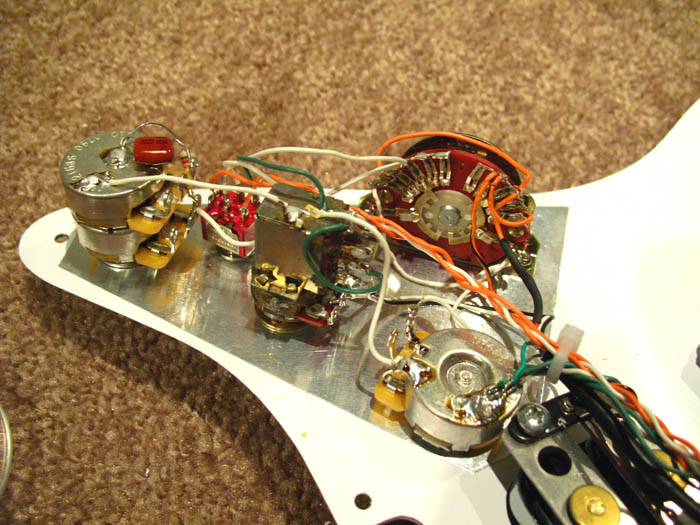
I used the 3-position mini-switch just like on the Ultra Strats. Here is what the “mini switch” does to the Dually Bridge pickup (and remember too, that these settings can be mixed with the other pickups). Up) activates the front bridge pickup which creates a out of phase hollow sound, which then can be mixed with the middle pickups with the 5-way switch. Middle) has the bridge pickups in series creating a hot humbucker sound. Down) activates the back pickup on the bridge to give a single coil sound giving more of a Tele bite sound. The distance of the pickups from the bridge creates different sounds. The 500k push/pull tone control is for the neck pickup. Pull up and you can tap (split) off one side of the humbucker giving you more of a single coil sound.
 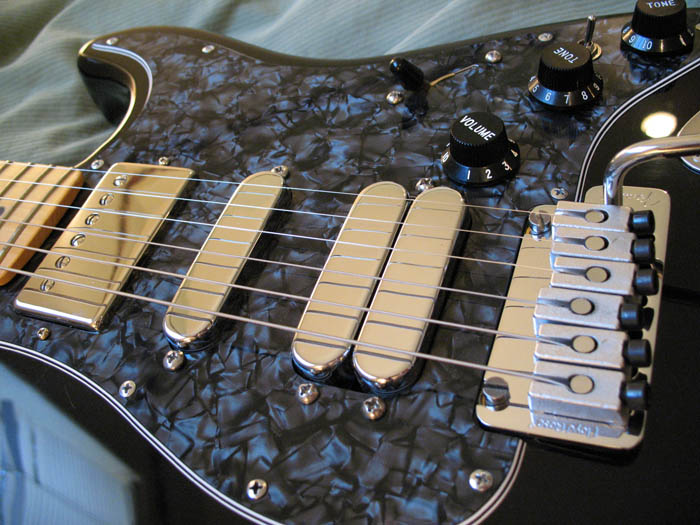 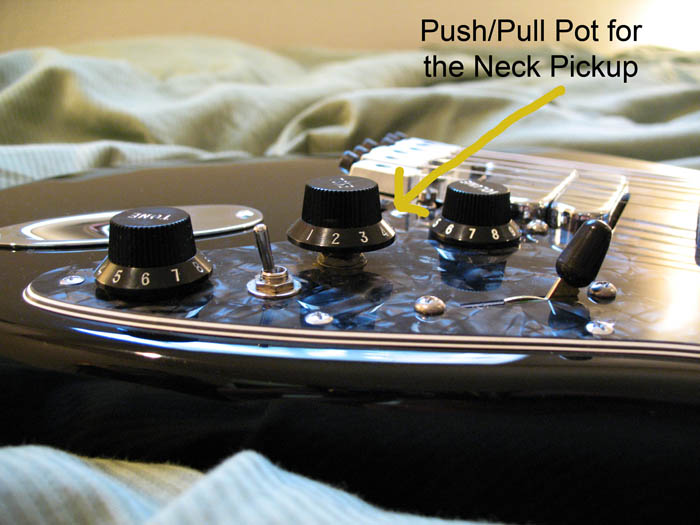 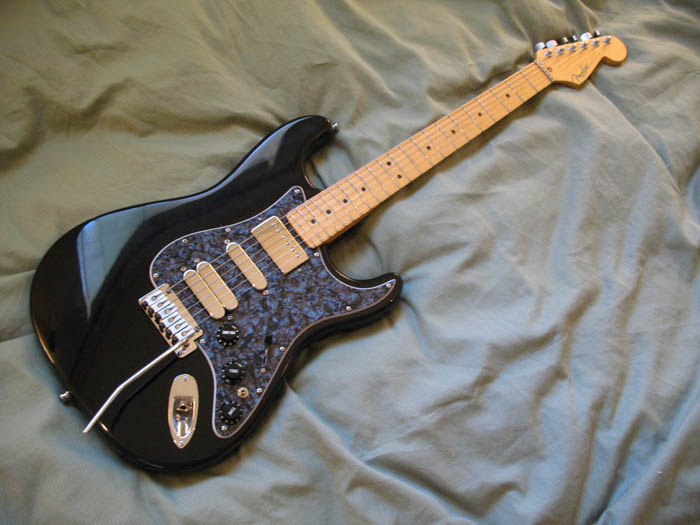
The end result is not only stunning to look at, but the tone on this Black 1995 Strat Plus Deluxe is unlike no other. With the Deluxe Floyd Rose II bridge and the DiMarzio humbucker it is a killer blue/jazz guitar. Yet it can go from tradition Strat sounds to even telecaster mix and bite!
*************************************
I will be putting more on here soon as well as a customize JD Tele wiring.....
|
